

Creating an STM32 Project Using CubeIDE Step by Step
Choosing a Development Environment
When selecting an IDE for an STM32 project, developers typically choose between STM32CubeIDE and Keil MDK-ARM, as these are among the most convenient development tools.
Let’s take a quick look at why we’ll be using STM32CubeIDE and what advantages it offers.
- Free and Unlimited . Unlike Keil, where the free version is limited to 32 KB of code (which is often not enough for complex projects), STM32CubeIDE imposes no such restrictions.
- Cross-Platform Compatibility. STM32CubeIDE works on Windows, Linux, and macOS, making it a versatile choice for developers with different preferences. Meanwhile, Keil only supports Windows, which isn’t always convenient. For example, I use Ubuntu, and running Keil on my system requires a lot of extra effort.
- Graphical Interface for Project Configuration .A powerful and user-friendly feature that allows you to quickly set up peripherals, clocks, and pins, generate code, and start development right away. This saves a lot of time and effort.
Creating Your First Project
Now that we understand why we’re using STM32CubeIDE, let’s download it and create our first project.
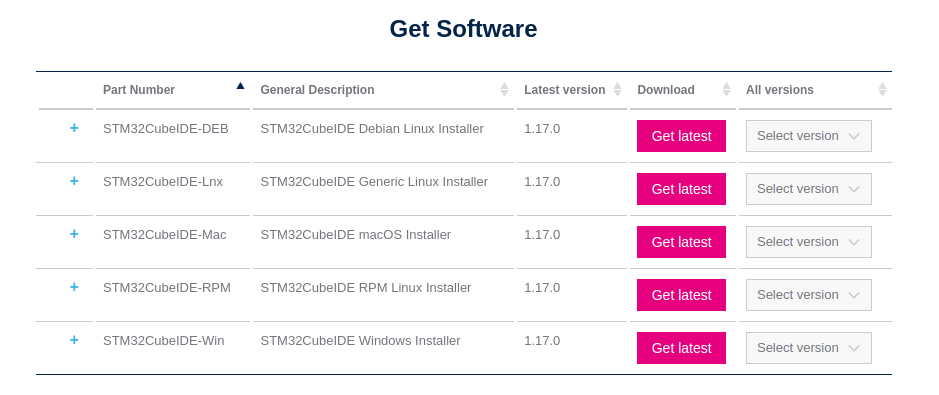
You can download it here: STM32CubeIDE Download.
Scroll down, and you’ll find options for different versions and operating systems.
To create a new project, click on File → New → STM32 Project.
You’ll see a window like this. In the bottom right corner (marked with a blue arrow), there is a list of all STM32 microcontrollers. On the left, you can search by parameters.
For now, we’ll skip that and just find our specific microcontroller.
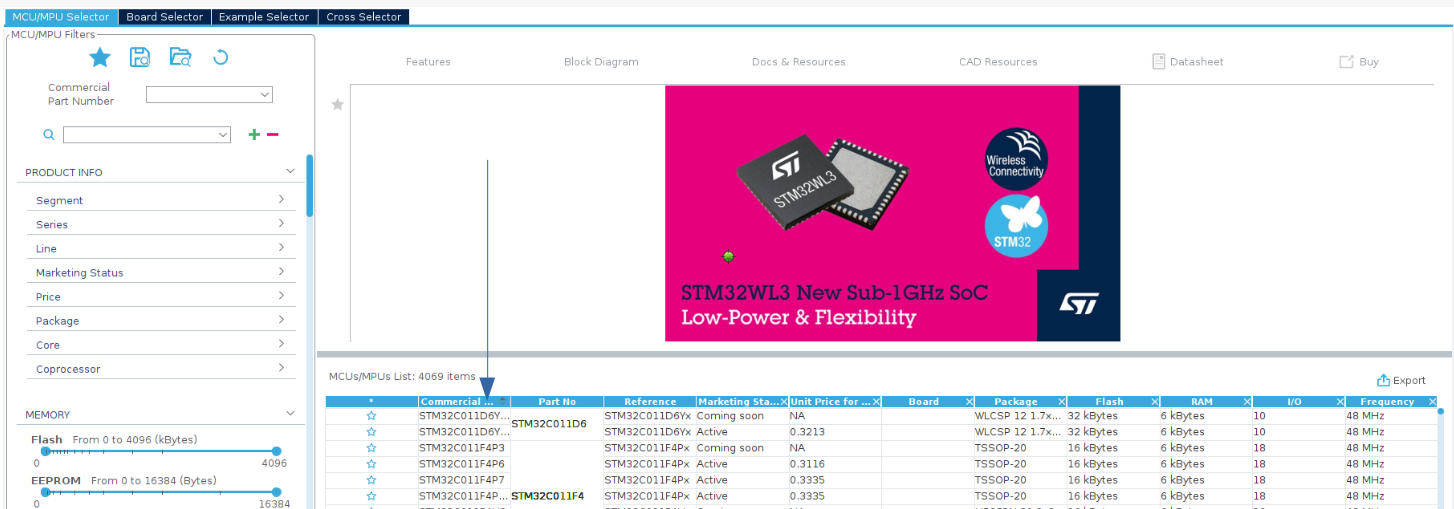
For example, I’ll be using the Discovery board with the STM32F407VGT6.
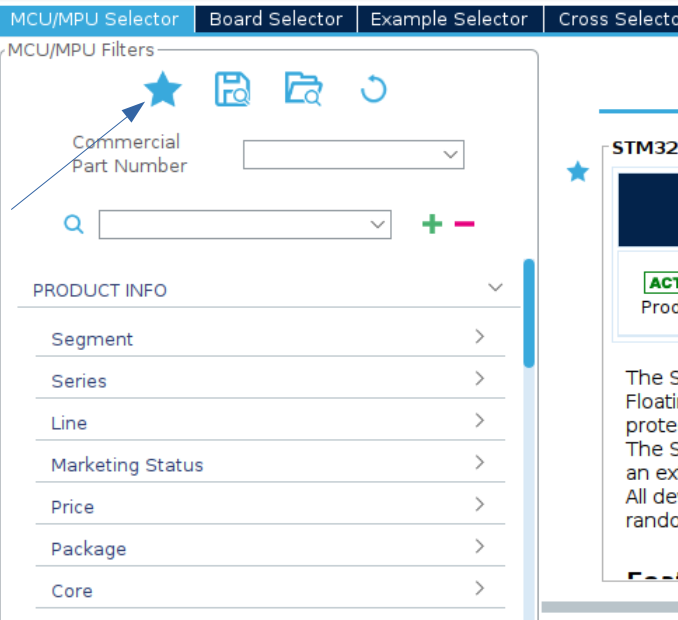
Once you’ve found your microcontroller, don’t rush to click “Next” just yet. To the left of its name, you’ll see a star icon. Click on it—this will add your microcontroller to your favorites, so you won’t have to search for it next time.
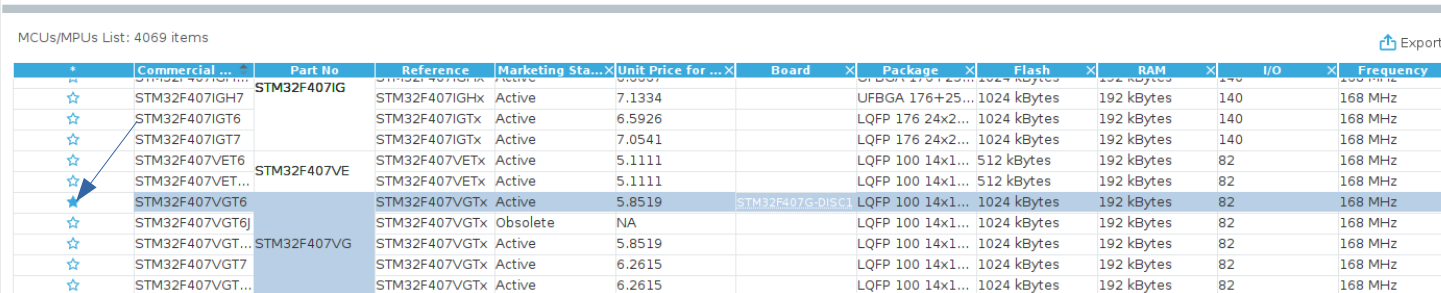
Next time, simply click the star icon in the left column to find it instantly.
Click the green “Next” button, and the project settings window will appear. It looks like this:
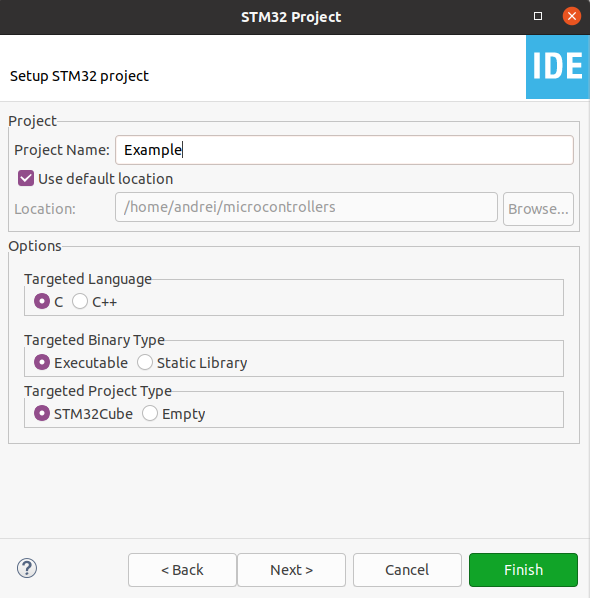
Leave everything as is and click “Finish”.
Your first project is now created. Here’s what it looks like:
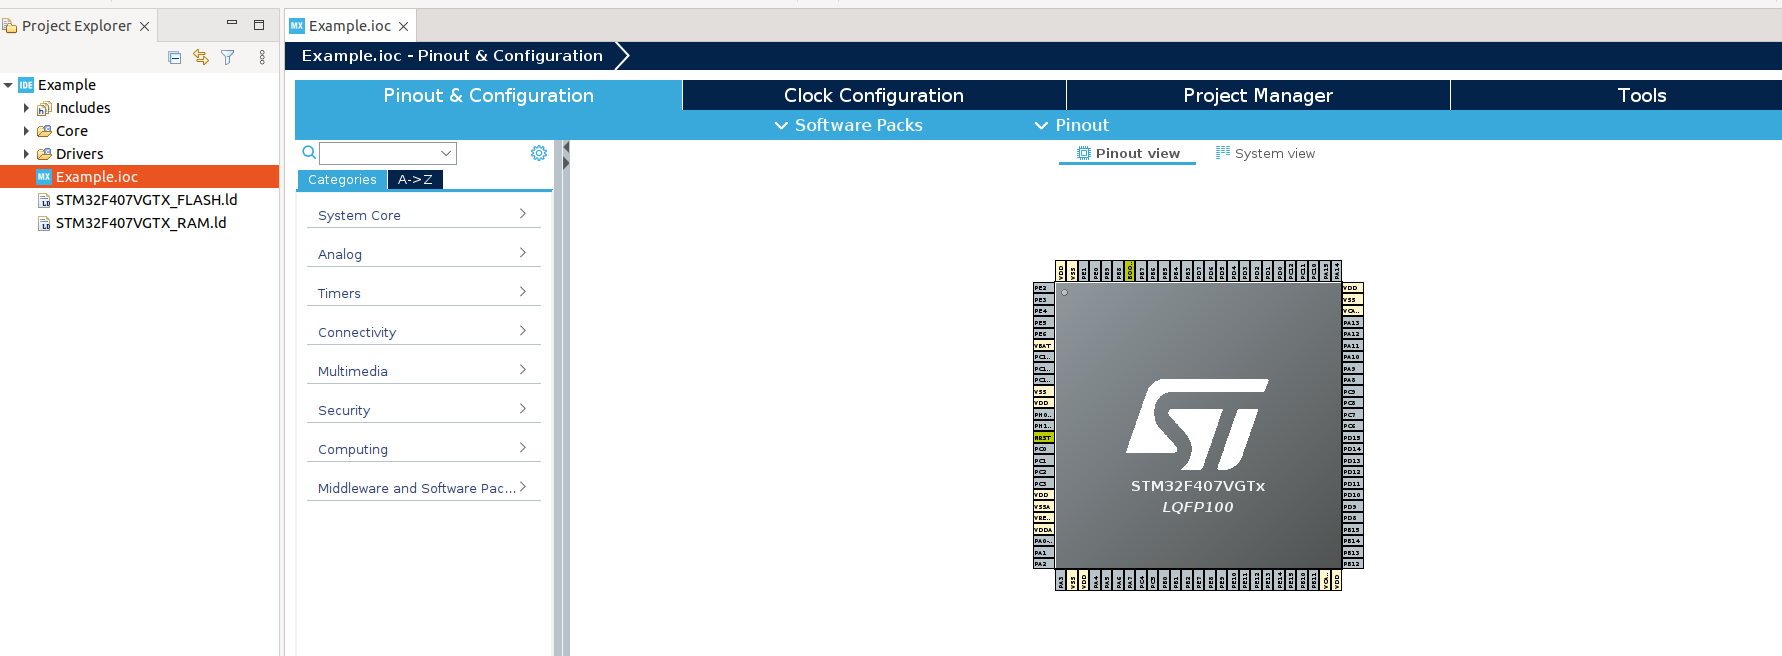
Project Configuration and Code Generation
We’ve selected the .ioc file, which contains the basic project settings, such as clock configuration, peripheral initialization, interrupts, and more.
Let’s set the basic frequency settings. In the System Core → RCC → High Speed Clock, choose Crystal/Ceramic Resonator.
On the STM32F4 Discovery board, there are two crystal oscillators: one at 8 MHz (HSE) and one at 32.768 kHz. HSE (High-Speed External) is important for the core and most peripheral devices. We’ll choose the 8 MHz clock by selecting HSE in Crystal/Ceramic Resonator.
Next, we’ll enable serial debugging. Go to SYS → Debug → Serial Wire. This will be useful later when debugging the program.
This is enough for the first program. All frequency settings can be viewed in the Clock Configuration window, which we’ll cover in one of the next articles.
Now, click on the generate code button in the top-left corner.
![]()
Let’s open our main file, located in the folder Core → Src → main.c. You’ll see the generated code for the project. We’ll cover the code structure in the next article.
Here’s an important point: The IDE not only generates the code, but it also marks areas where you can write your own code. These areas start with USER CODE BEGIN and end with USER CODE END. If you write anything outside of these areas, your code will be overwritten and lost the next time the code is generated, so keep that in mind.
For example, if we want to add something inside the infinite while loop, we should do it within the block:
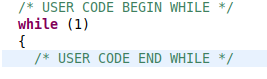
Otherwise, you risk losing it.
Interim Summary
We’ve covered the basic project setup in STM32CubeIDE. Let’s quickly get some results by blinking an LED on the board, which we’ll do in next article.
Thanks for your attention, and good luck with your projects!