

Code Disappearance During Autogeneration
When working on STM32 projects in STM32CubeIDE, you may often encounter a situation where your custom code gets overwritten after modifying the .ioc file and regenerating the code. This happens because CubeIDE updates main.c during code generation.
To prevent losing your changes in future regenerations, there is a special mechanism that allows you to preserve your code. This mechanism involves using specific comment markers, which look like this:
/* USER CODE BEGIN*/
Your code
/* USER CODE END */
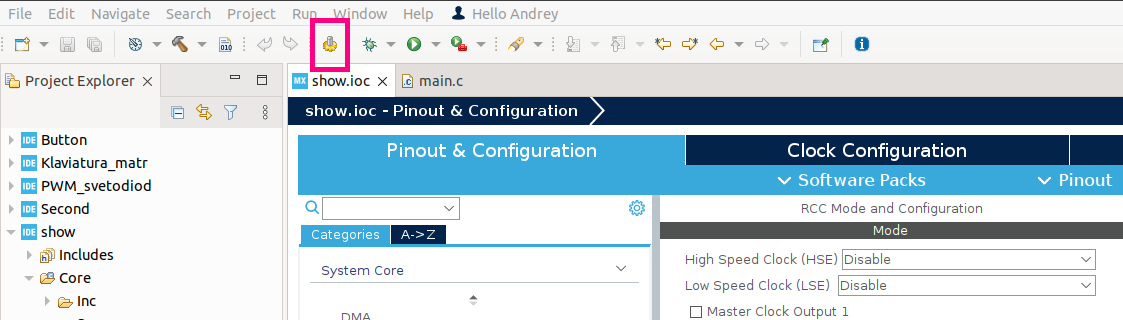
To generate code, you can use the shortcut Alt + K or the icon on the toolbar.
The while(1) Loop
Before diving into each section, let’s briefly discuss the while loop. This loop ensures that the program runs continuously, executing all tasks that need to be performed indefinitely. These tasks may include peripheral control, interrupt handling, or executing the device’s main algorithm. The while(1) loop keeps the microcontroller in an active state until it is powered off or reset.
In most cases, it’s best to avoid an infinite while(1) loop if more efficient alternatives, such as interrupts, are available. A while(1) loop keeps the CPU busy even when there are no tasks to execute, making the code less scalable and preventing power optimization. Instead, it’s preferable to use interrupts, which execute code only when needed, or an RTOS (such as FreeRTOS) to manage tasks efficiently.
However, if your application is simple, using just a while(1) loop may be sufficient.
Purpose of Each Code Block in main.c
In CubeIDE, when creating a project, there is a special code structure with designated sections. While you can write your code in any user-defined block, placing it in the appropriate sections improves maintainability, simplifies debugging, and prevents accidental deletion during code regeneration. Following the project structure helps maintain readability, organization, and compatibility with the auto-generation tools.
I’ll keep it as brief as possible so you can quickly determine where to insert your code.
/* USER CODE BEGIN Header */
General file information. Typically includes a project description, author, and license.
/* USER CODE BEGIN Includes */
Additional header files.
#include "my_library.h"
/* USER CODE BEGIN PTD */
User-defined data types (typedef, enum, struct).
typedef struct {
int x;
int y;
} Point;
/* USER CODE BEGIN PD */
Default parameters.
#define UART_BAUDRATE 9600
#define LED_PIN GPIO_PIN_5
/* USER CODE BEGIN PM */
User-defined macros, such as pin and port definitions for LEDs, etc.
#define LED_PIN GPIO_PIN_13
#define LED_PORT GPIOC
/* USER CODE BEGIN PV */
Global variables.
uint8_t buttonPressed = 0;
int sensorValue = 0;
/* USER CODE BEGIN PFP */
Function prototypes (name, parameters, and return type) without implementation.
void BlinkLED(void);
int ReadSensorValue(void);
/* USER CODE BEGIN 0 */
A section for adding user code that executes **before** initial system setup and HAL initialization. This is useful for calling custom functions or assigning initial values to variables.
counter = 100;
mode = 1;
/* USER CODE BEGIN 1 */
Similar to the previous section but executes inside `main()`.
/* USER CODE BEGIN Init */
User-specific initialization, setting initial parameters, and passing necessary data to peripherals.
midiNoteOn[0] = 0x09;
/* USER CODE BEGIN SysInit */
General system settings, including system timers, interrupts, etc.
NVIC_SetPriority(EXTI0_IRQn, 2);
/* USER CODE BEGIN 2 */
Any actions performed after peripheral initialization. Useful for debugging messages before entering the main loop.
HAL_GPIO_WritePin(GPIOA, GPIO_PIN_5, GPIO_PIN_SET);
/* USER CODE BEGIN WHILE */
The main loop section where the core program tasks are executed. This can include sensor readings, peripheral interactions, event handling, etc.
HAL_GPIO_TogglePin(GPIOA, GPIO_PIN_5);
HAL_Delay(500);
/* USER CODE BEGIN 3 */
If there are tasks that should be executed after the main logic but before the next loop iteration, place them here. Useful for debugging information.
printf("Loop iteration complete\n");
/* USER CODE BEGIN 4 */
A section for user-defined function implementations.
void Blink_LED(uint8_t times, uint16_t delay_ms) {
for (uint8_t i = 0; i < times; i++) {
HAL_GPIO_TogglePin(GPIOA, GPIO_PIN_5);
HAL_Delay(delay_ms);
HAL_GPIO_TogglePin(GPIOA, GPIO_PIN_5);
HAL_Delay(delay_ms);
}
}
/* USER CODE BEGIN Error_Handler_Debug */
A section for error handling and debugging code.
char *error_msg = "Error detected! System halted.\r\n";
HAL_UART_Transmit(&huart2, (uint8_t*)error_msg, strlen(error_msg), HAL_MAX_DELAY);
Proper Integration of User Code Sections in STM32CubeIDE
To integrate your custom code into an STM32CubeIDE project, the best approach is to place it in a separate file. This ensures modularity, easier maintenance, and protection from being deleted during code regeneration.
The process involves creating a header file (.h) for function declarations and a source file (.c) for implementations. The header file is then included in main.c, and the compiler automatically links it to the corresponding .c file during compilation.
Let’s go step by step. For example, if we need to move the function YourFunction to a separate file, we follow these steps:
Step-by-Step Guide to Moving Code to a Separate File in STM32CubeIDE
- Create a Header File. In the Inc folder, create a file named your_section_file.h and declare your function inside it:
void YourFunction(void);
- Create a Source File.In the Src folder, create a file named your_section_file.c. Include the header file and implement the function:
#include "your_section_file.h" void YourFunction(void) { HAL_GPIO_TogglePin(GPIOA, GPIO_PIN_5); HAL_Delay(500); } - Include the Header in main.c In main.c, add the following line at the top:
#include "your_section_file.h";
- Call the Function. Inside the main loop or wherever needed, call your function:
#include "your_section_file.h";
By following this structure, you keep your code modular, maintainable, and safe from being overwritten by STM32CubeIDE’s code generation.
In this article, we explored the main sections of the main.c file in STM32CubeIDE and addressed the issue of user code disappearing during regeneration. We identified the appropriate sections for adding your code to keep it well-structured and also covered how to integrate custom code into a separate file.